Add a Trigger and Create a Policy in the UI
Step 1: Add a Trigger
-
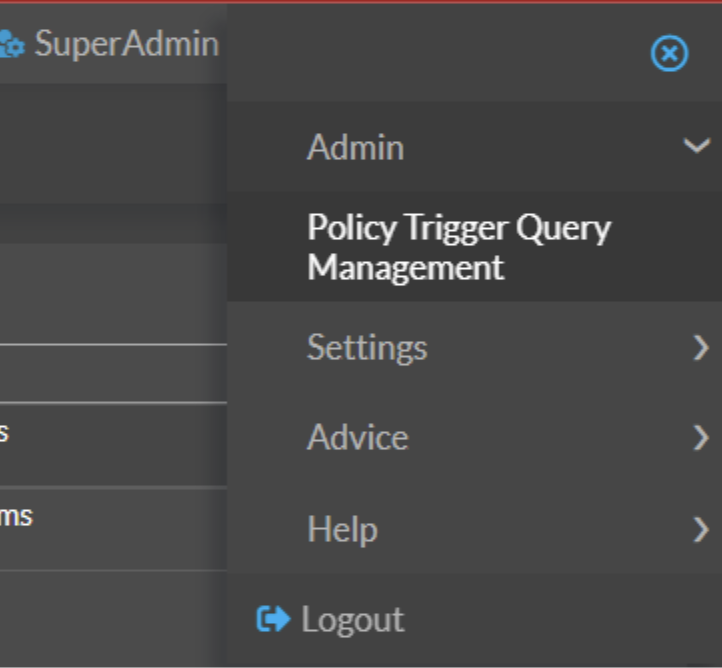
Open the Trigger Management Interface:
- Click the hamburger menu in the upper-right corner.
- Select Admin > Policy Trigger Management.
-
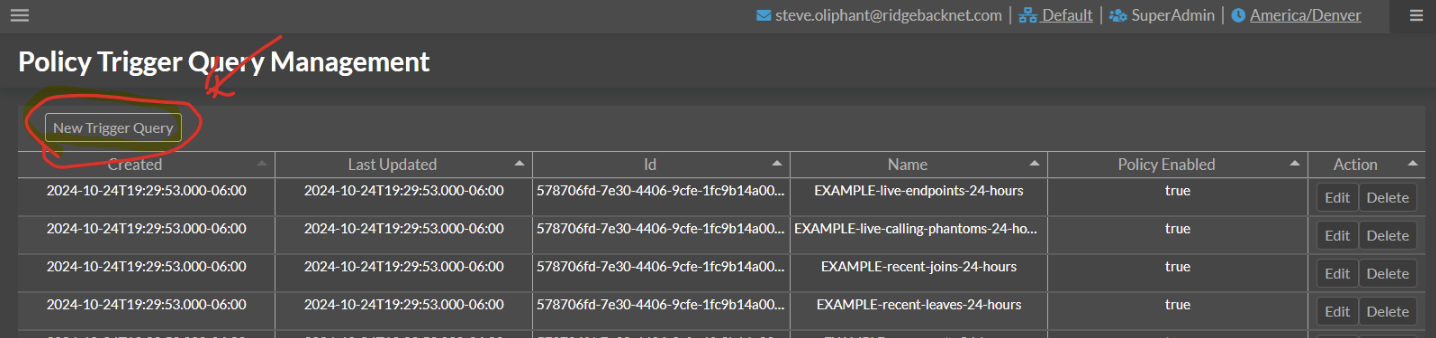
Create a New Trigger:
- Click New Trigger Query in the top-left corner.
-
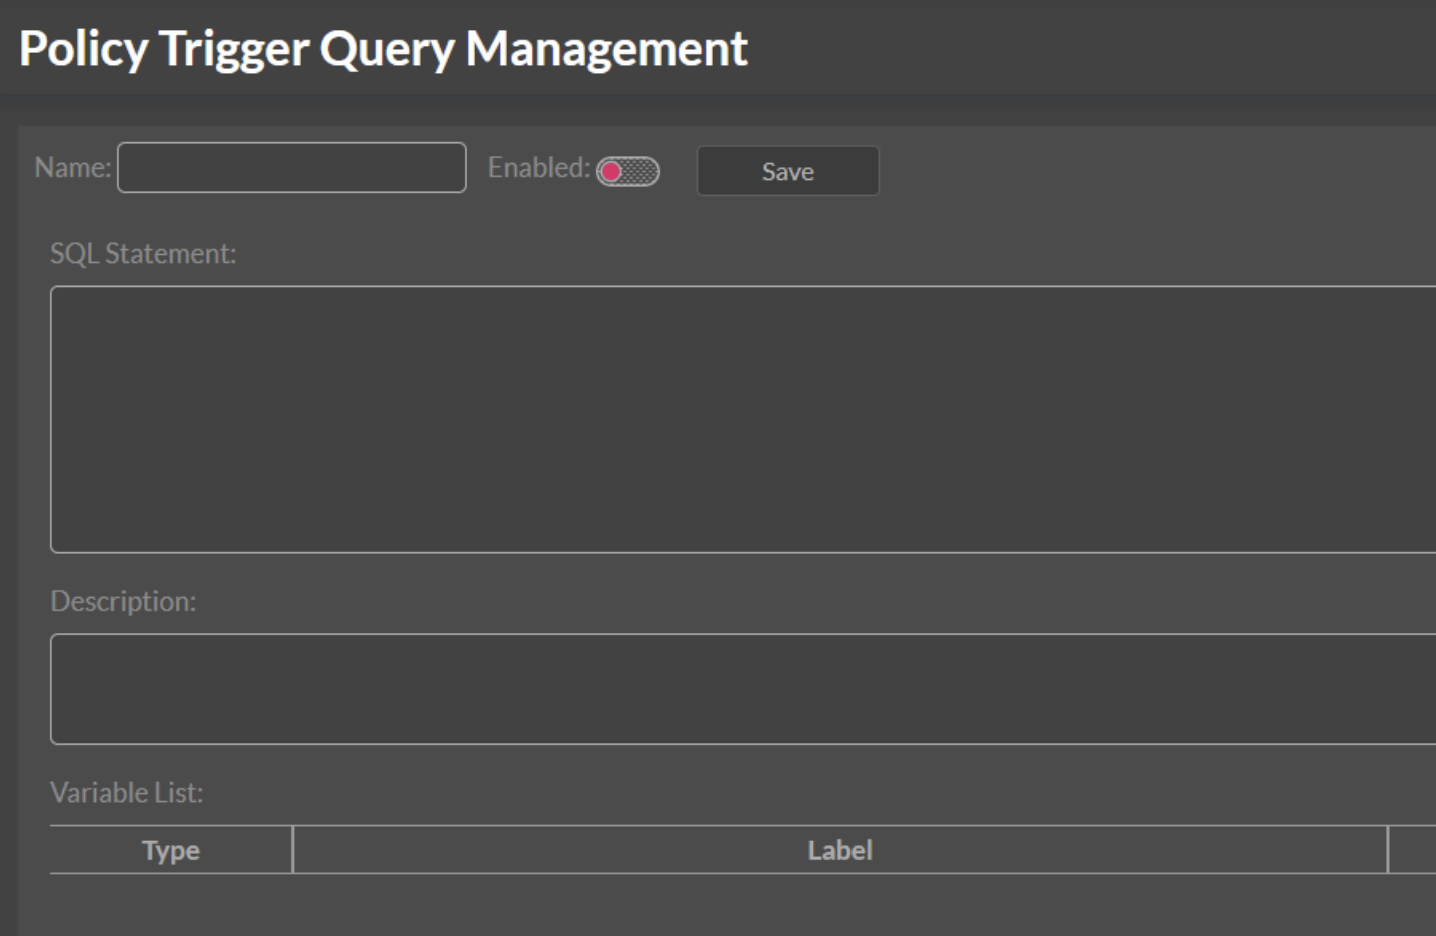
Configure the Trigger:
- Name the trigger (this will appear in the list when creating policies).
- Toggle Enabled to make it available in the policy trigger list.
- Paste the SQL query from the documentation.
- Add a description and click Save.
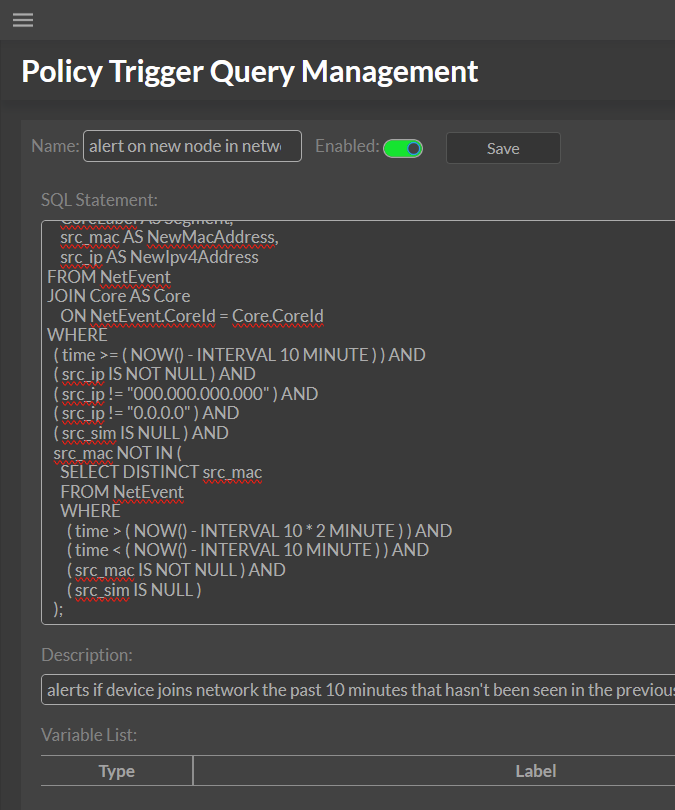
Example configuration:
-
Repeat for Additional Triggers:
- Set up triggers like "Phantom Contact" and "Device Joining the Network" from the documentation.
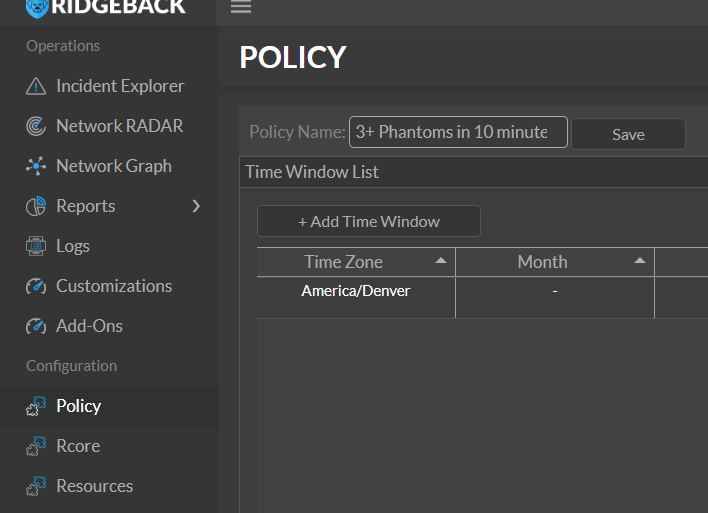
Step 2: Create a Policy
-
Access Policy Creation:
- Click Policy in the left-hand menu.
- Select New Policy.
-
Name the Policy and Configure Time Settings:
- Enter a name for the policy.
- Add a Time Window:
Default settings:- Start: Hour Midnight, Minute 0
- End: Hour 11 PM, Minute 59
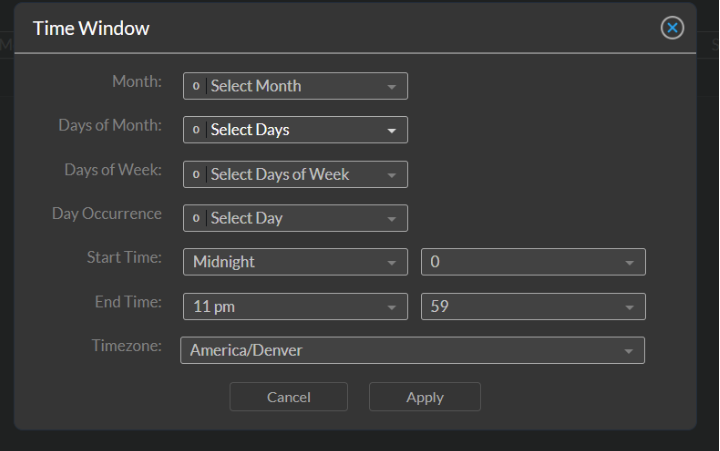
- Leave everything else unselected for the policy to run continuously.
- Click Apply.
-
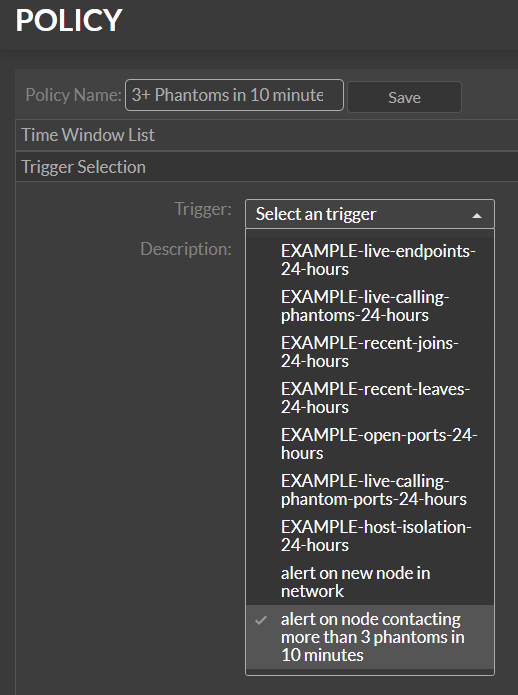
Select a Trigger:
- Go to Trigger Selection.
- Choose the trigger you set up.
-
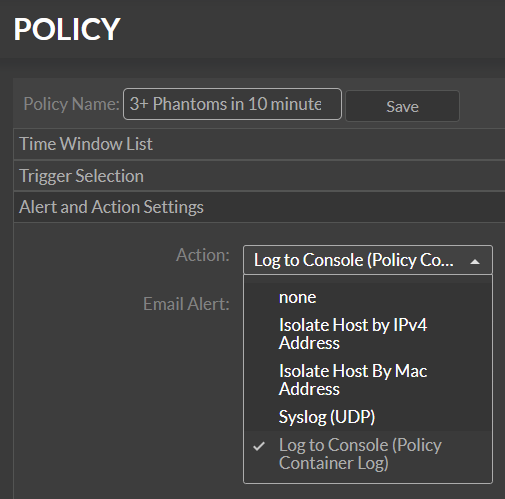
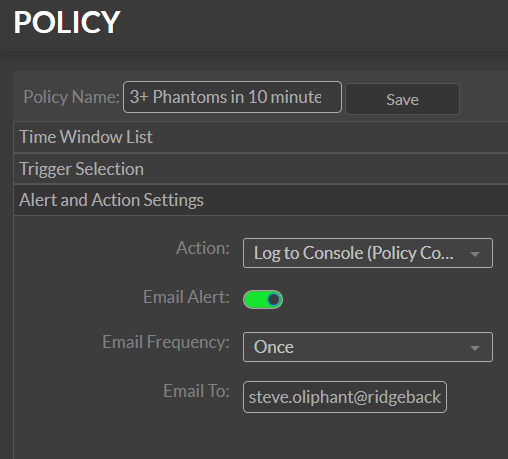
Set Alerts and Actions:
- Navigate to Alert and Action Settings.
- Set the action to Log to Console (Policy Container Log).
- Enable Email Alert:
- Set "Email Frequency" to Once.
- Enter the recipient email in Email To.
-
Save the Policy:
- Click Save.
- If there are missing fields, the system will guide you to complete them.
-
Repeat for Additional Policies:
- Follow these steps for each trigger you’ve set up.
Troubleshooting
- If emails do not arrive:
- Check the Policy container log for errors.
- Use Docker Desktop GUI or run the command:
docker compose logs policy - Review the log for email errors or policy output.